> ## Documentation Index
> Fetch the complete documentation index at: https://docs.taginsight.com/llms.txt
> Use this file to discover all available pages before exploring further.
# Quick start
> Get Tag Insight up and running in under 5 minutes
## Overview
Tag Insight can be set up in just a few simple steps. This guide will walk you through the process of getting your first tracking plan monitored.
Sign up for Tag Insight and create your organization
Set up your first project for the property you want to monitor
Add the Tag Insight pixel to your website
Import your existing tracking plan or create a new one
Configure your audits and start receiving alerts
## 1. Create your organization
When you first log into Tag Insight, you'll need to create an organization. This is the top-level container for all your projects.
Organizations can contain multiple projects, allowing you to manage tracking for different brands, environments, or properties.
## 2. Create your first project
Projects in Tag Insight represent individual tracking implementations. Each project gets its own unique pixel.
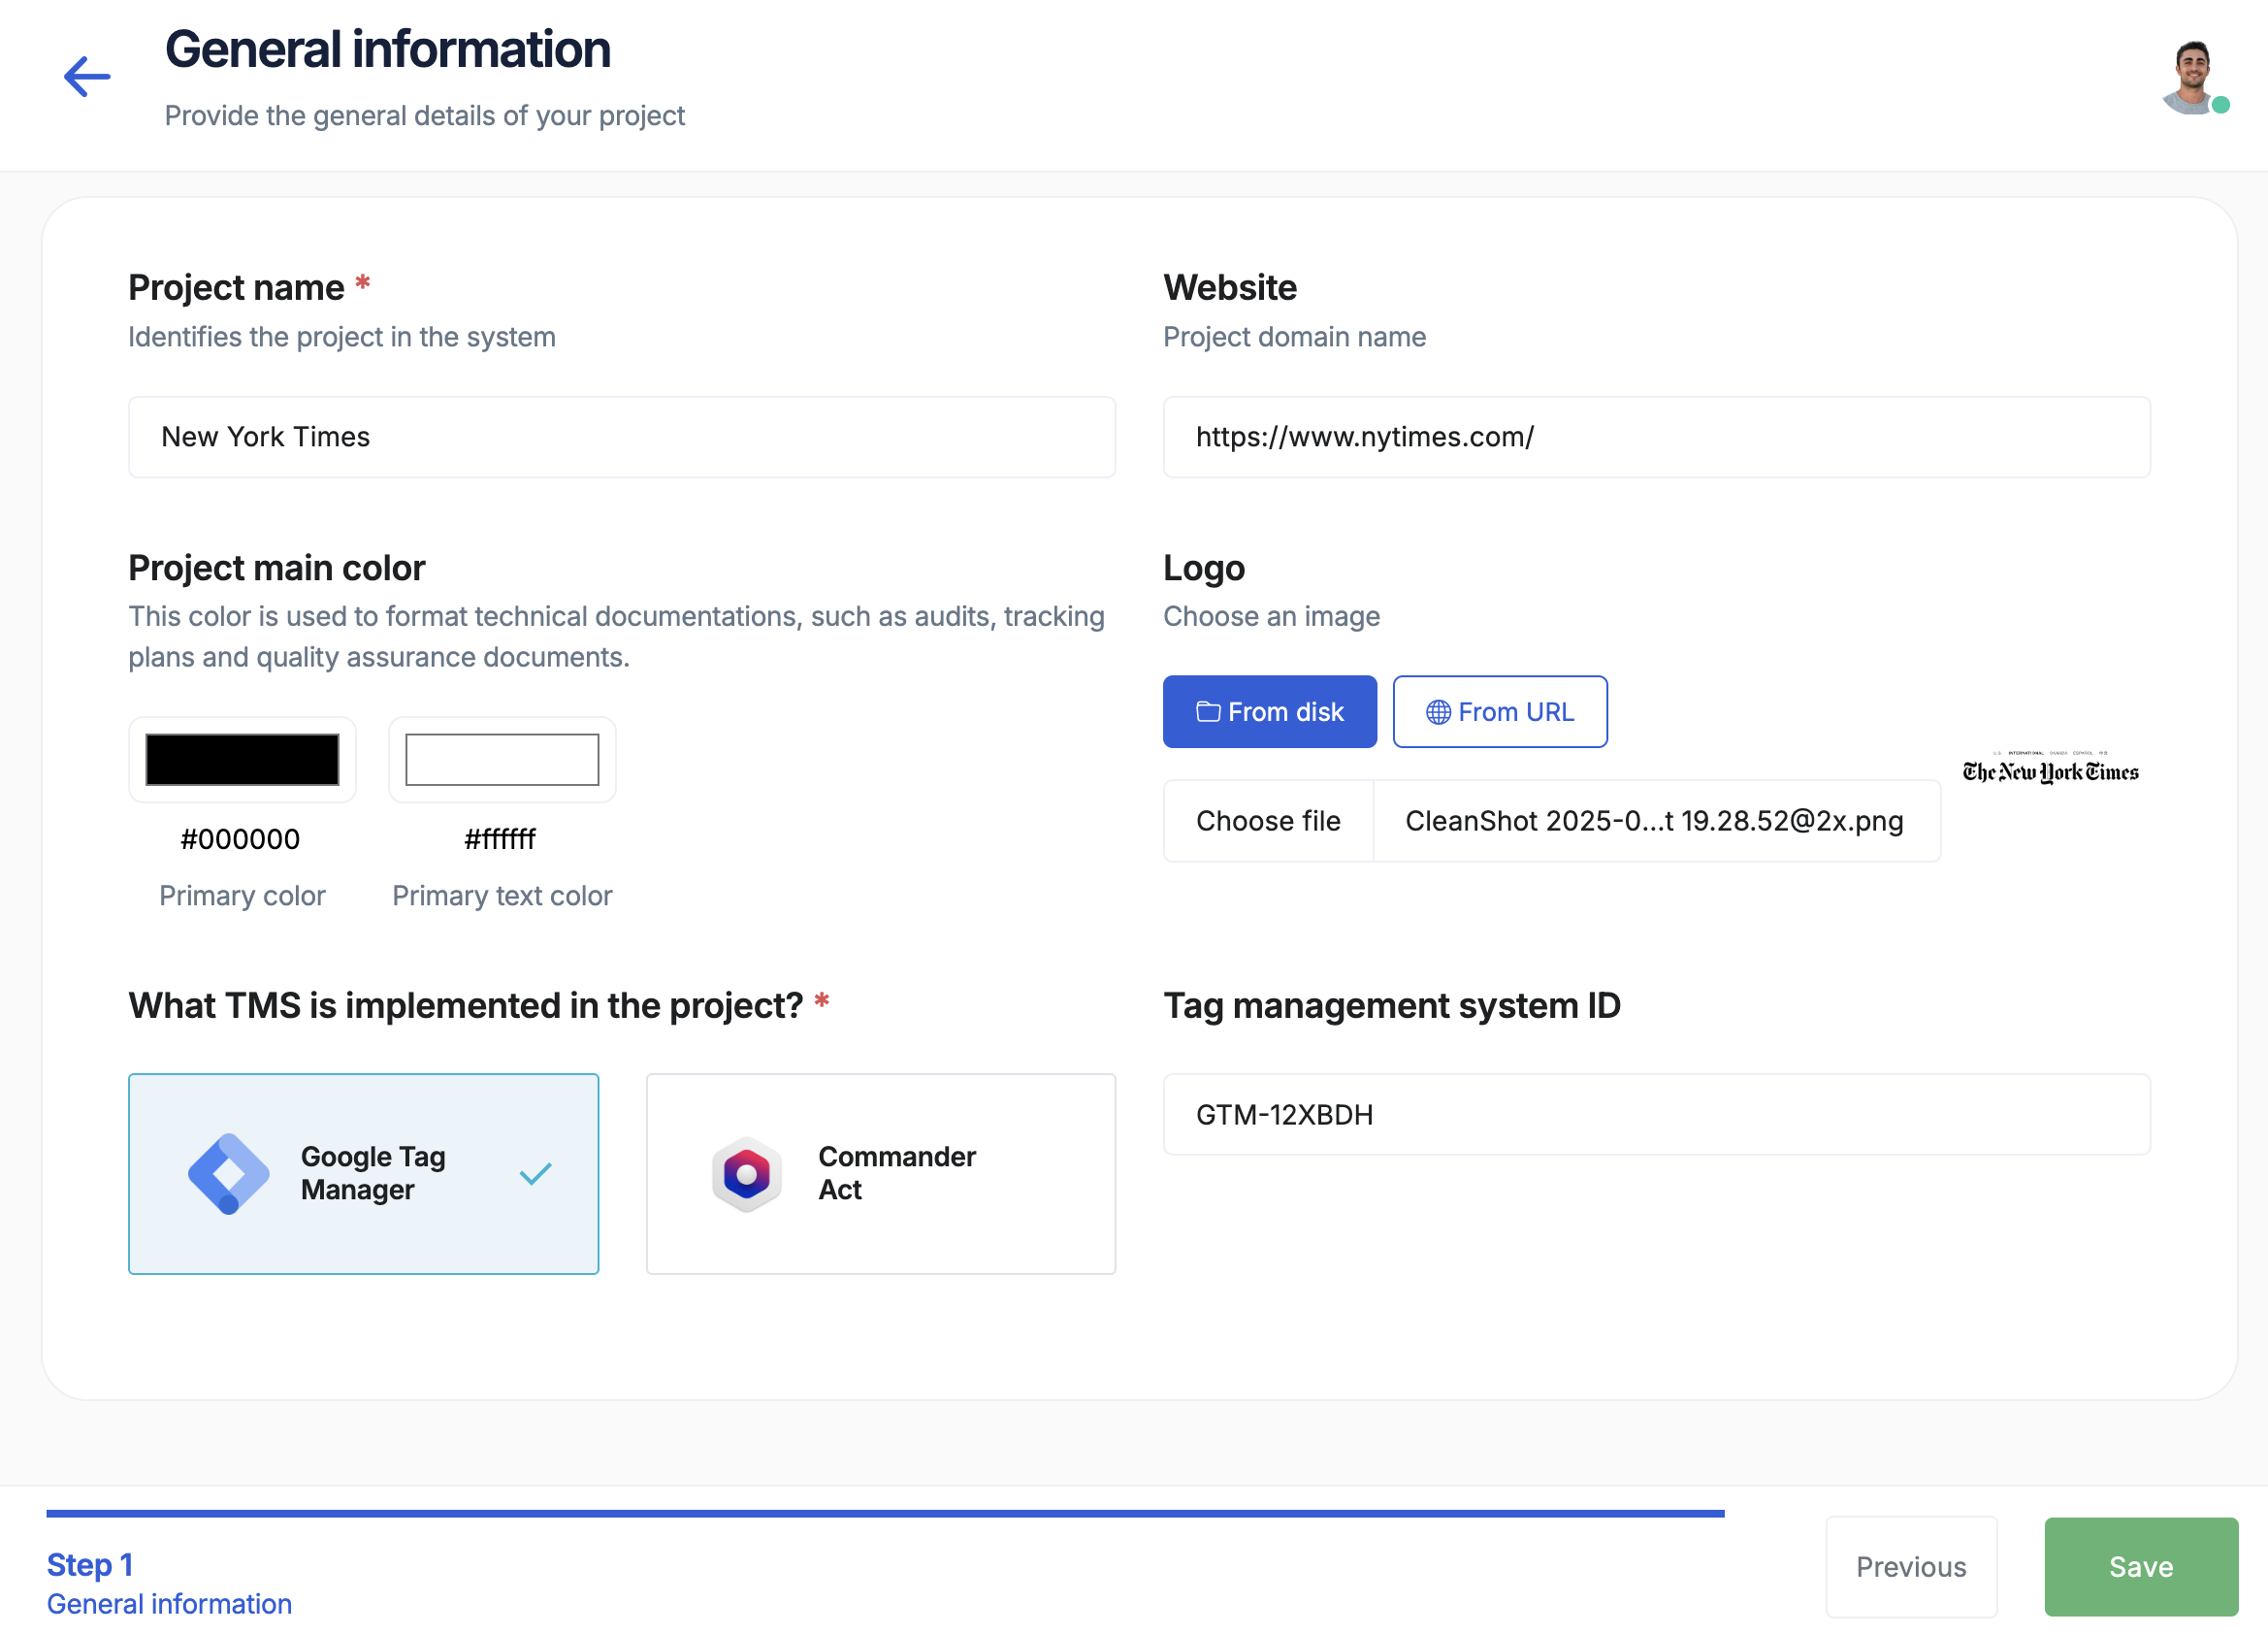 1. Click **New Project** from your organization dashboard
2. Enter a project name (e.g., "Production - Main Site")
3. Select your Tag Management System (GTM, Commander Act, or Tealium)
4. Add a project logo (optional but recommended for documentation)
5. Click **Create Project**
* Create separate projects for different environments (staging, production)
* Use descriptive names that include the environment and property
* One pixel = one project, so plan accordingly
## 3. Install the Tag Insight pixel
The Tag Insight pixel is a lightweight JavaScript tag that monitors your data layers in real-time.
### Installation via Google Tag Manager
```javascript theme={null}
```
Replace `YOUR_PROJECT_ID` with your actual project ID from the Tag Insight dashboard.
### Key features of the pixel
* **Lightweight**: Less than 200KB
* **Privacy-compliant**: No cookies, exempt from consent requirements
* **Performance-optimized**: Asynchronous loading, no impact on page speed
* **Universal**: Works with any data layer structure
## 4. Import your tracking plan
Tag Insight offers multiple methods to import your tracking plan:
Use the Detect Tracking Plan feature to automatically discover and import your existing implementation
Use our Chrome extension to capture data layers as you browse your site
Import from Excel or create your tracking plan manually
Start from pre-built templates for common implementations
### Quick import with Chrome extension
Install the Tag Insight Chrome extension from the Chrome Web Store
Navigate to your website and click the extension icon to start capturing
Navigate through key user journeys (product views, add to cart, checkout)
Stop capture and select which events to import into your project
## 5. Configure your first audit
Once your tracking plan is imported, set up automated monitoring:
```javascript theme={null}
// Example audit configuration
{
"name": "Daily production audit",
"frequency": "daily",
"time": "09:00",
"duration": "1 hour",
"trackingPlan": "main-tracking-plan",
"alertEmail": "team@company.com"
}
```
### Audit configuration options
* **Frequency**: Hourly, daily, weekly, or continuous
* **Scope**: Full tracking plan or specific events
* **Alerts**: Email notifications for regressions
* **Sampling**: Choose between sampled or full traffic analysis
## Next steps
Congratulations! Tag Insight is now monitoring your tracking implementation. Here's what to do next:
Set up alert rules and notification preferences
Learn how to read and act on audit reports
Invite your team and set up permissions
Configure multi-environment monitoring
Need help? Contact our support team at [support@taginsight.com](mailto:support@taginsight.com) or check out our [FAQ](/troubleshooting/faq).
1. Click **New Project** from your organization dashboard
2. Enter a project name (e.g., "Production - Main Site")
3. Select your Tag Management System (GTM, Commander Act, or Tealium)
4. Add a project logo (optional but recommended for documentation)
5. Click **Create Project**
* Create separate projects for different environments (staging, production)
* Use descriptive names that include the environment and property
* One pixel = one project, so plan accordingly
## 3. Install the Tag Insight pixel
The Tag Insight pixel is a lightweight JavaScript tag that monitors your data layers in real-time.
### Installation via Google Tag Manager
```javascript theme={null}
```
Replace `YOUR_PROJECT_ID` with your actual project ID from the Tag Insight dashboard.
### Key features of the pixel
* **Lightweight**: Less than 200KB
* **Privacy-compliant**: No cookies, exempt from consent requirements
* **Performance-optimized**: Asynchronous loading, no impact on page speed
* **Universal**: Works with any data layer structure
## 4. Import your tracking plan
Tag Insight offers multiple methods to import your tracking plan:
Use the Detect Tracking Plan feature to automatically discover and import your existing implementation
Use our Chrome extension to capture data layers as you browse your site
Import from Excel or create your tracking plan manually
Start from pre-built templates for common implementations
### Quick import with Chrome extension
Install the Tag Insight Chrome extension from the Chrome Web Store
Navigate to your website and click the extension icon to start capturing
Navigate through key user journeys (product views, add to cart, checkout)
Stop capture and select which events to import into your project
## 5. Configure your first audit
Once your tracking plan is imported, set up automated monitoring:
```javascript theme={null}
// Example audit configuration
{
"name": "Daily production audit",
"frequency": "daily",
"time": "09:00",
"duration": "1 hour",
"trackingPlan": "main-tracking-plan",
"alertEmail": "team@company.com"
}
```
### Audit configuration options
* **Frequency**: Hourly, daily, weekly, or continuous
* **Scope**: Full tracking plan or specific events
* **Alerts**: Email notifications for regressions
* **Sampling**: Choose between sampled or full traffic analysis
## Next steps
Congratulations! Tag Insight is now monitoring your tracking implementation. Here's what to do next:
Set up alert rules and notification preferences
Learn how to read and act on audit reports
Invite your team and set up permissions
Configure multi-environment monitoring
Need help? Contact our support team at [support@taginsight.com](mailto:support@taginsight.com) or check out our [FAQ](/troubleshooting/faq).