> ## Documentation Index
> Fetch the complete documentation index at: https://docs.taginsight.com/llms.txt
> Use this file to discover all available pages before exploring further.
# Google Tag Manager setup
> How to set up Tag Insight with Google Tag Manager
## Overview
Google Tag Manager (GTM) is the most popular way to manage tracking on websites. If your website uses GTM, setting up Tag Insight is straightforward - your technical team just needs to add one tag.
## What you'll need
Before starting, make sure you have:
* ✅ Someone with access to your Google Tag Manager account
* ✅ Your Tag Insight Project ID (found in your dashboard)
* ✅ About 15 minutes for setup
Don't have GTM access? Ask your web developer or digital marketing team - they'll have it!
## Setup process
### Step 1: Access Google Tag Manager
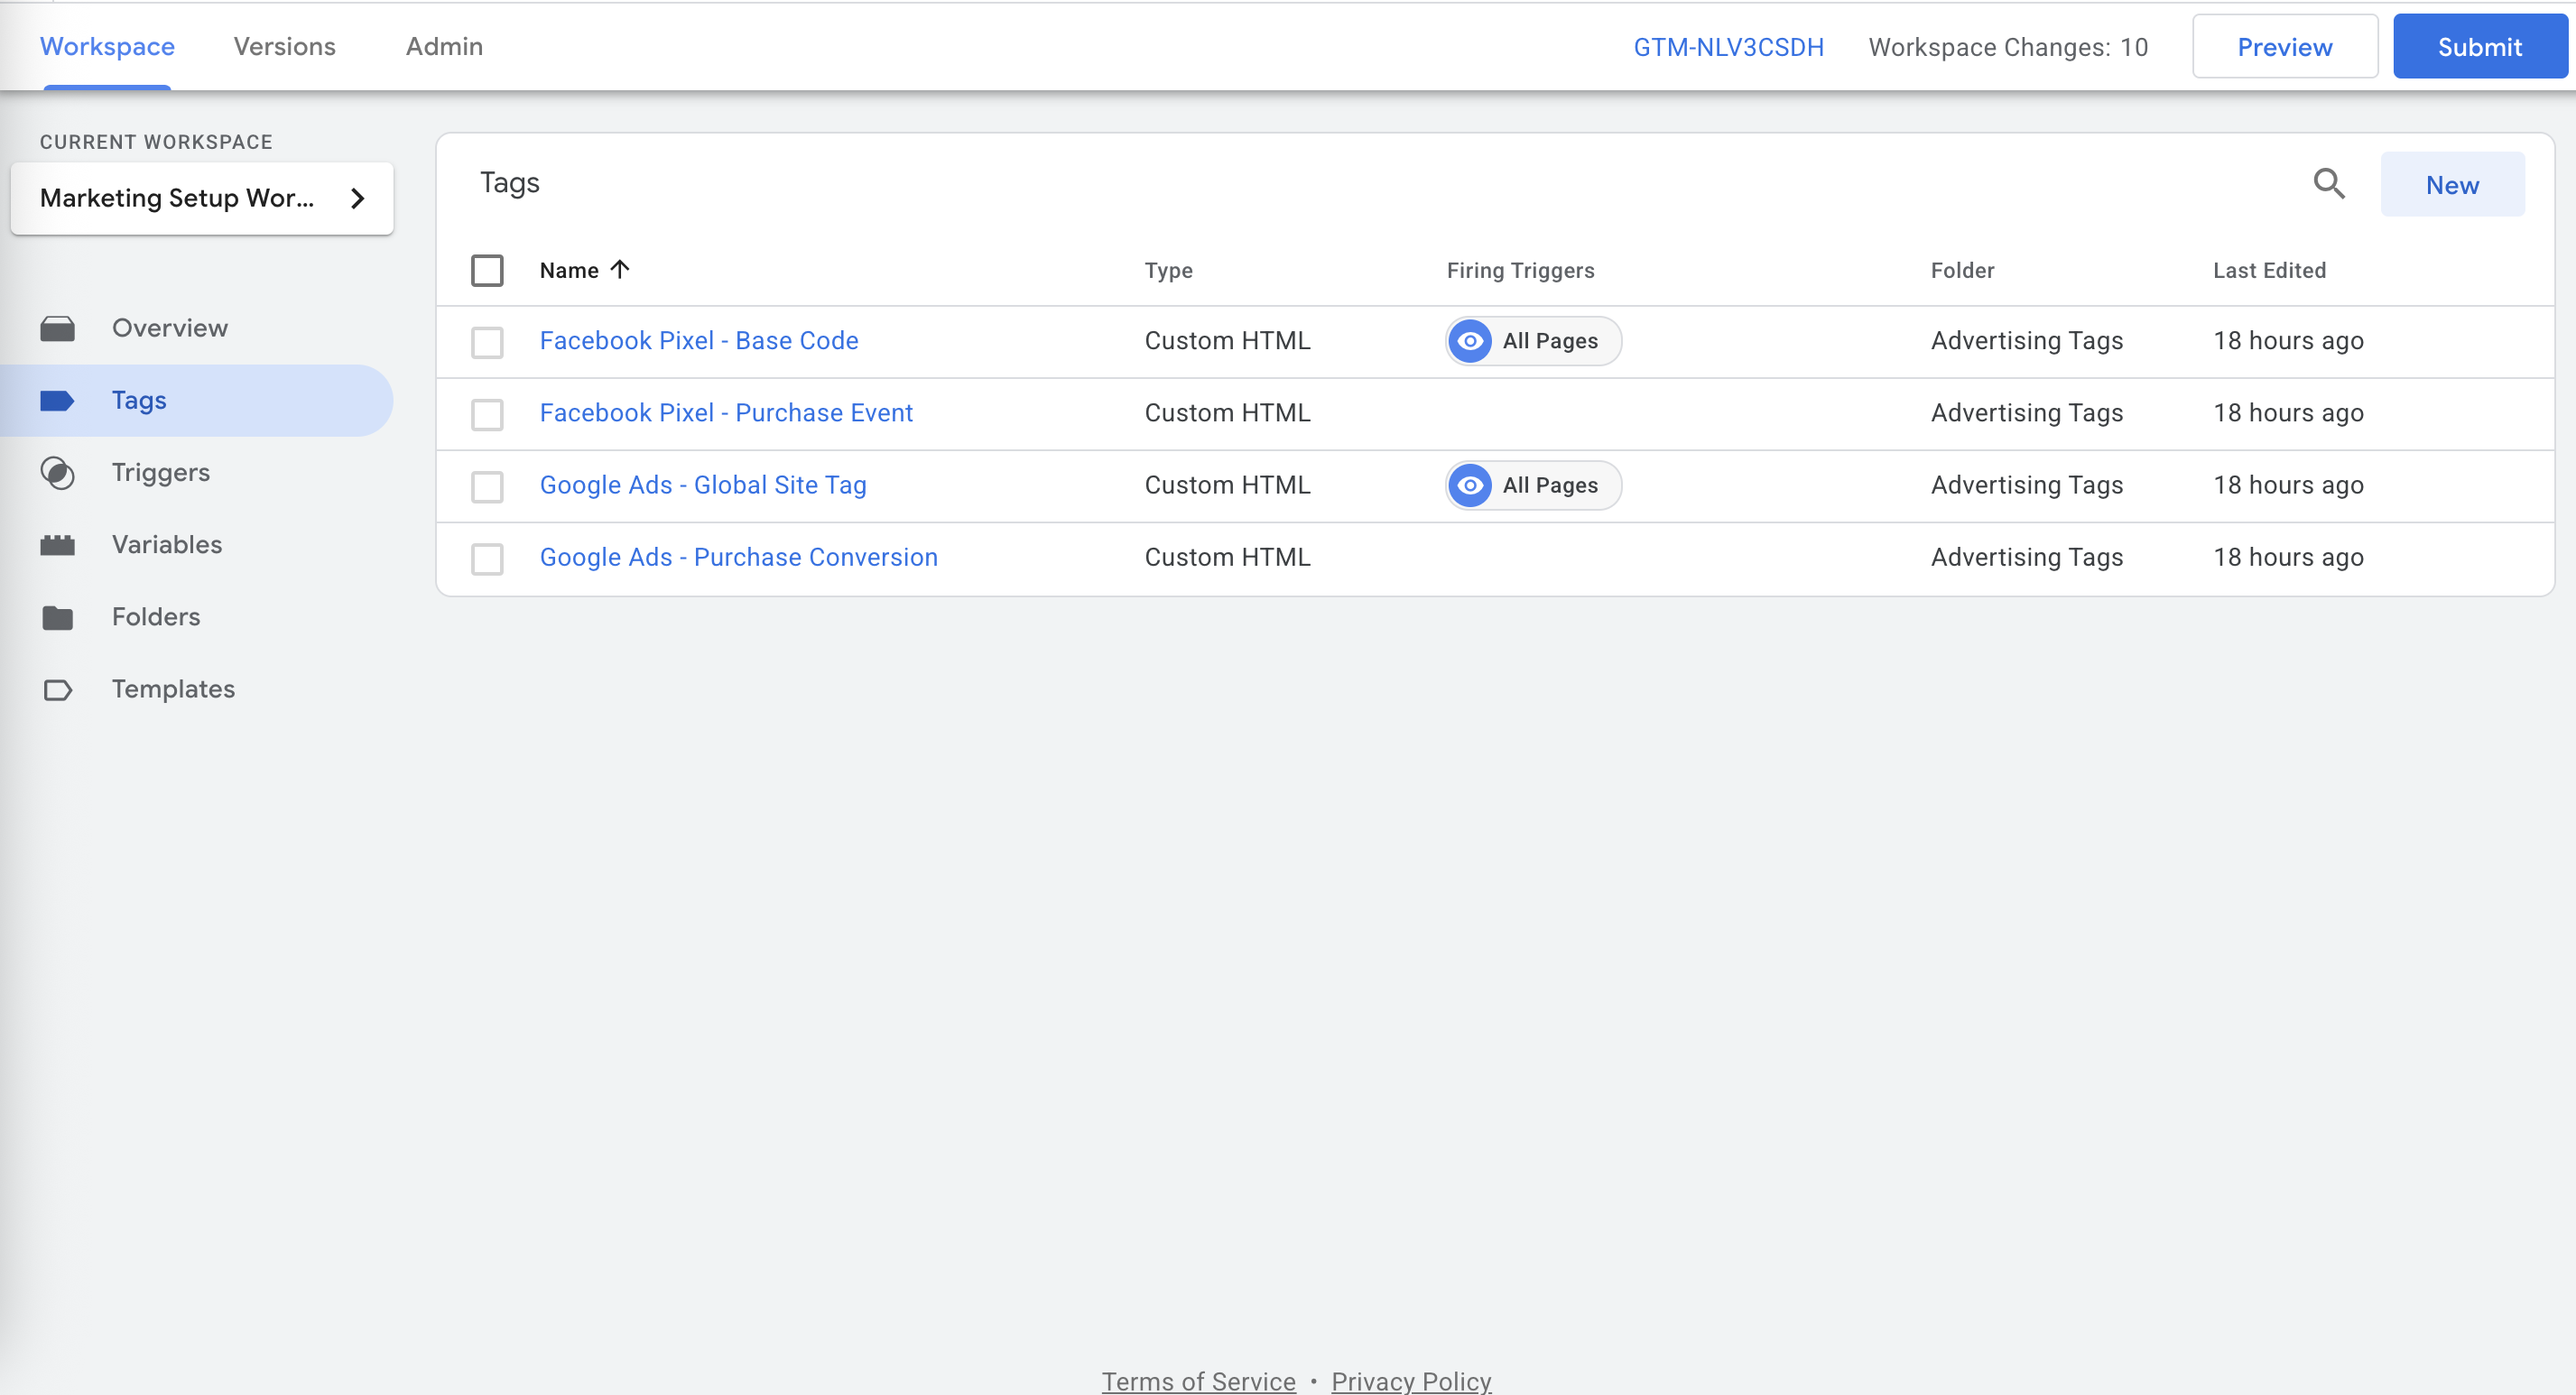 Your technical team member should:
Go to tagmanager.google.com and sign in
Choose the container for your website
Click "Tags" in the left menu
Click "New" to create a tag for Tag Insight
### Step 2: Configure Tag Insight
Your technical team member should:
Go to tagmanager.google.com and sign in
Choose the container for your website
Click "Tags" in the left menu
Click "New" to create a tag for Tag Insight
### Step 2: Configure Tag Insight
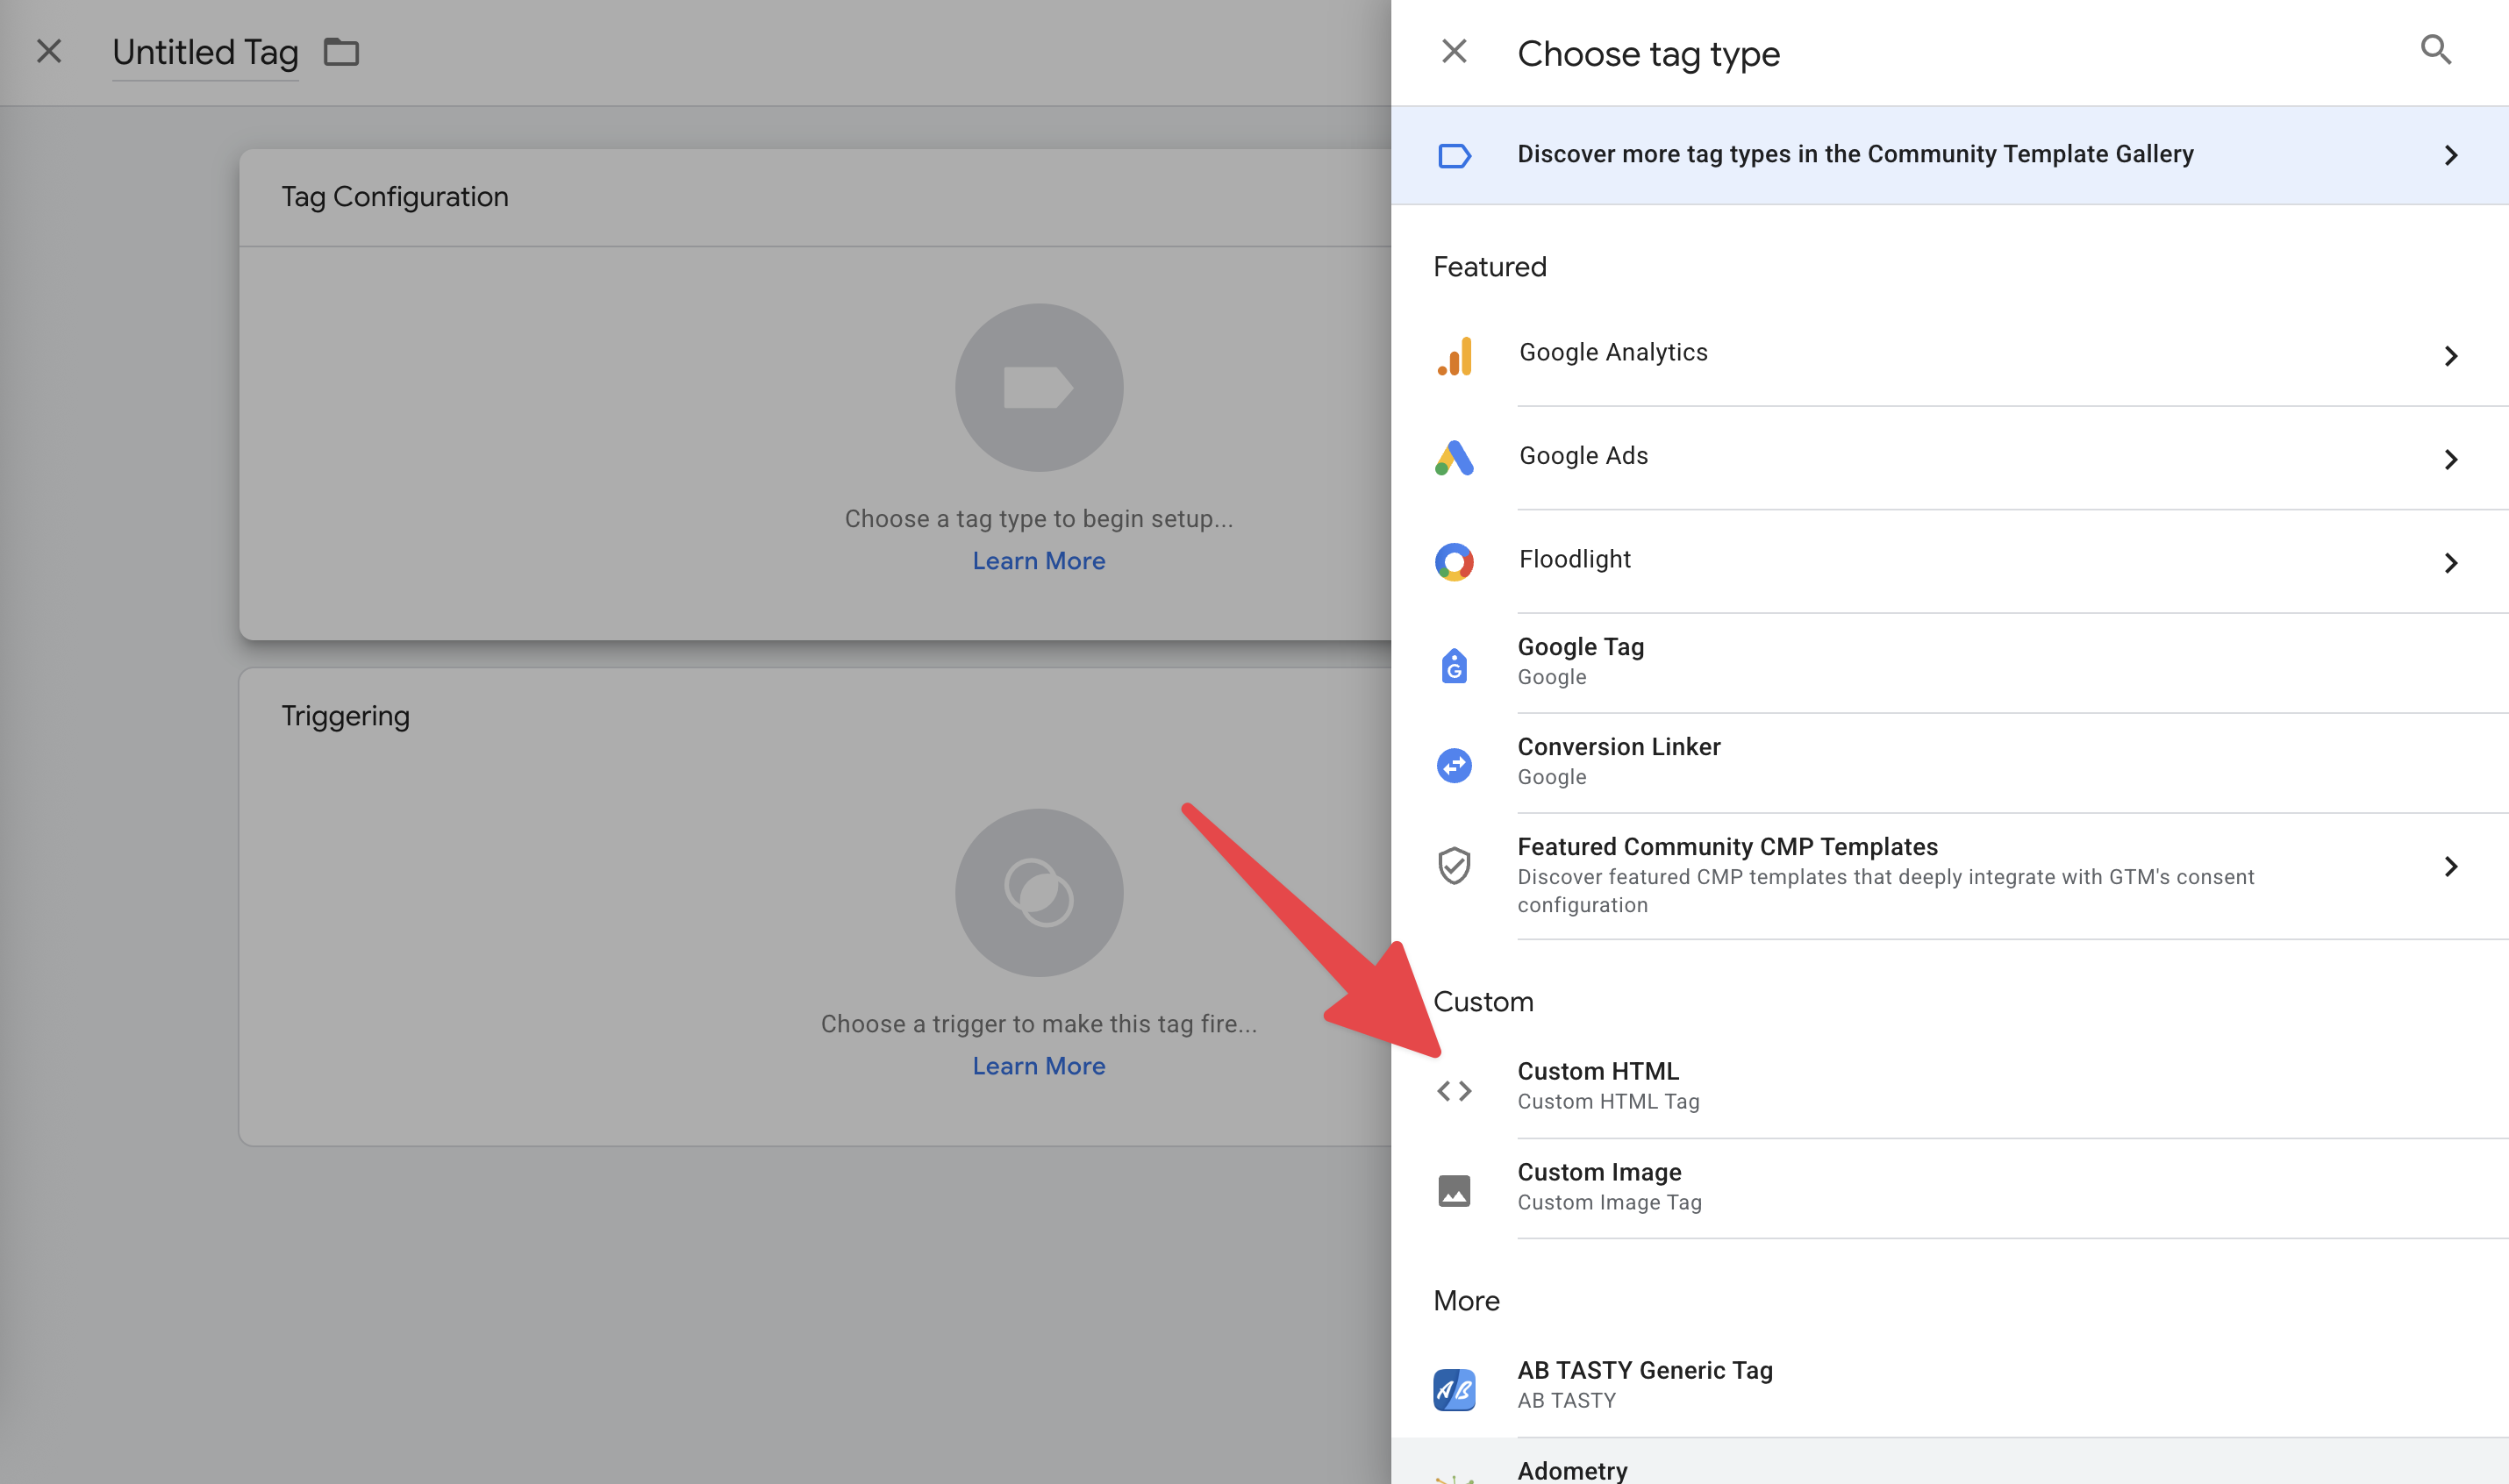 Your developer will:
1. Name the tag "Tag Insight - Monitoring"
2. Choose "Custom HTML" as the tag type
3. Add the Tag Insight code (they can get this from our support team)
4. Replace YOUR\_PROJECT\_ID with your actual project ID
Make sure to use your specific Project ID from the Tag Insight dashboard - each project has a unique ID.
### Step 3: Set where it runs
Your developer will:
1. Name the tag "Tag Insight - Monitoring"
2. Choose "Custom HTML" as the tag type
3. Add the Tag Insight code (they can get this from our support team)
4. Replace YOUR\_PROJECT\_ID with your actual project ID
Make sure to use your specific Project ID from the Tag Insight dashboard - each project has a unique ID.
### Step 3: Set where it runs
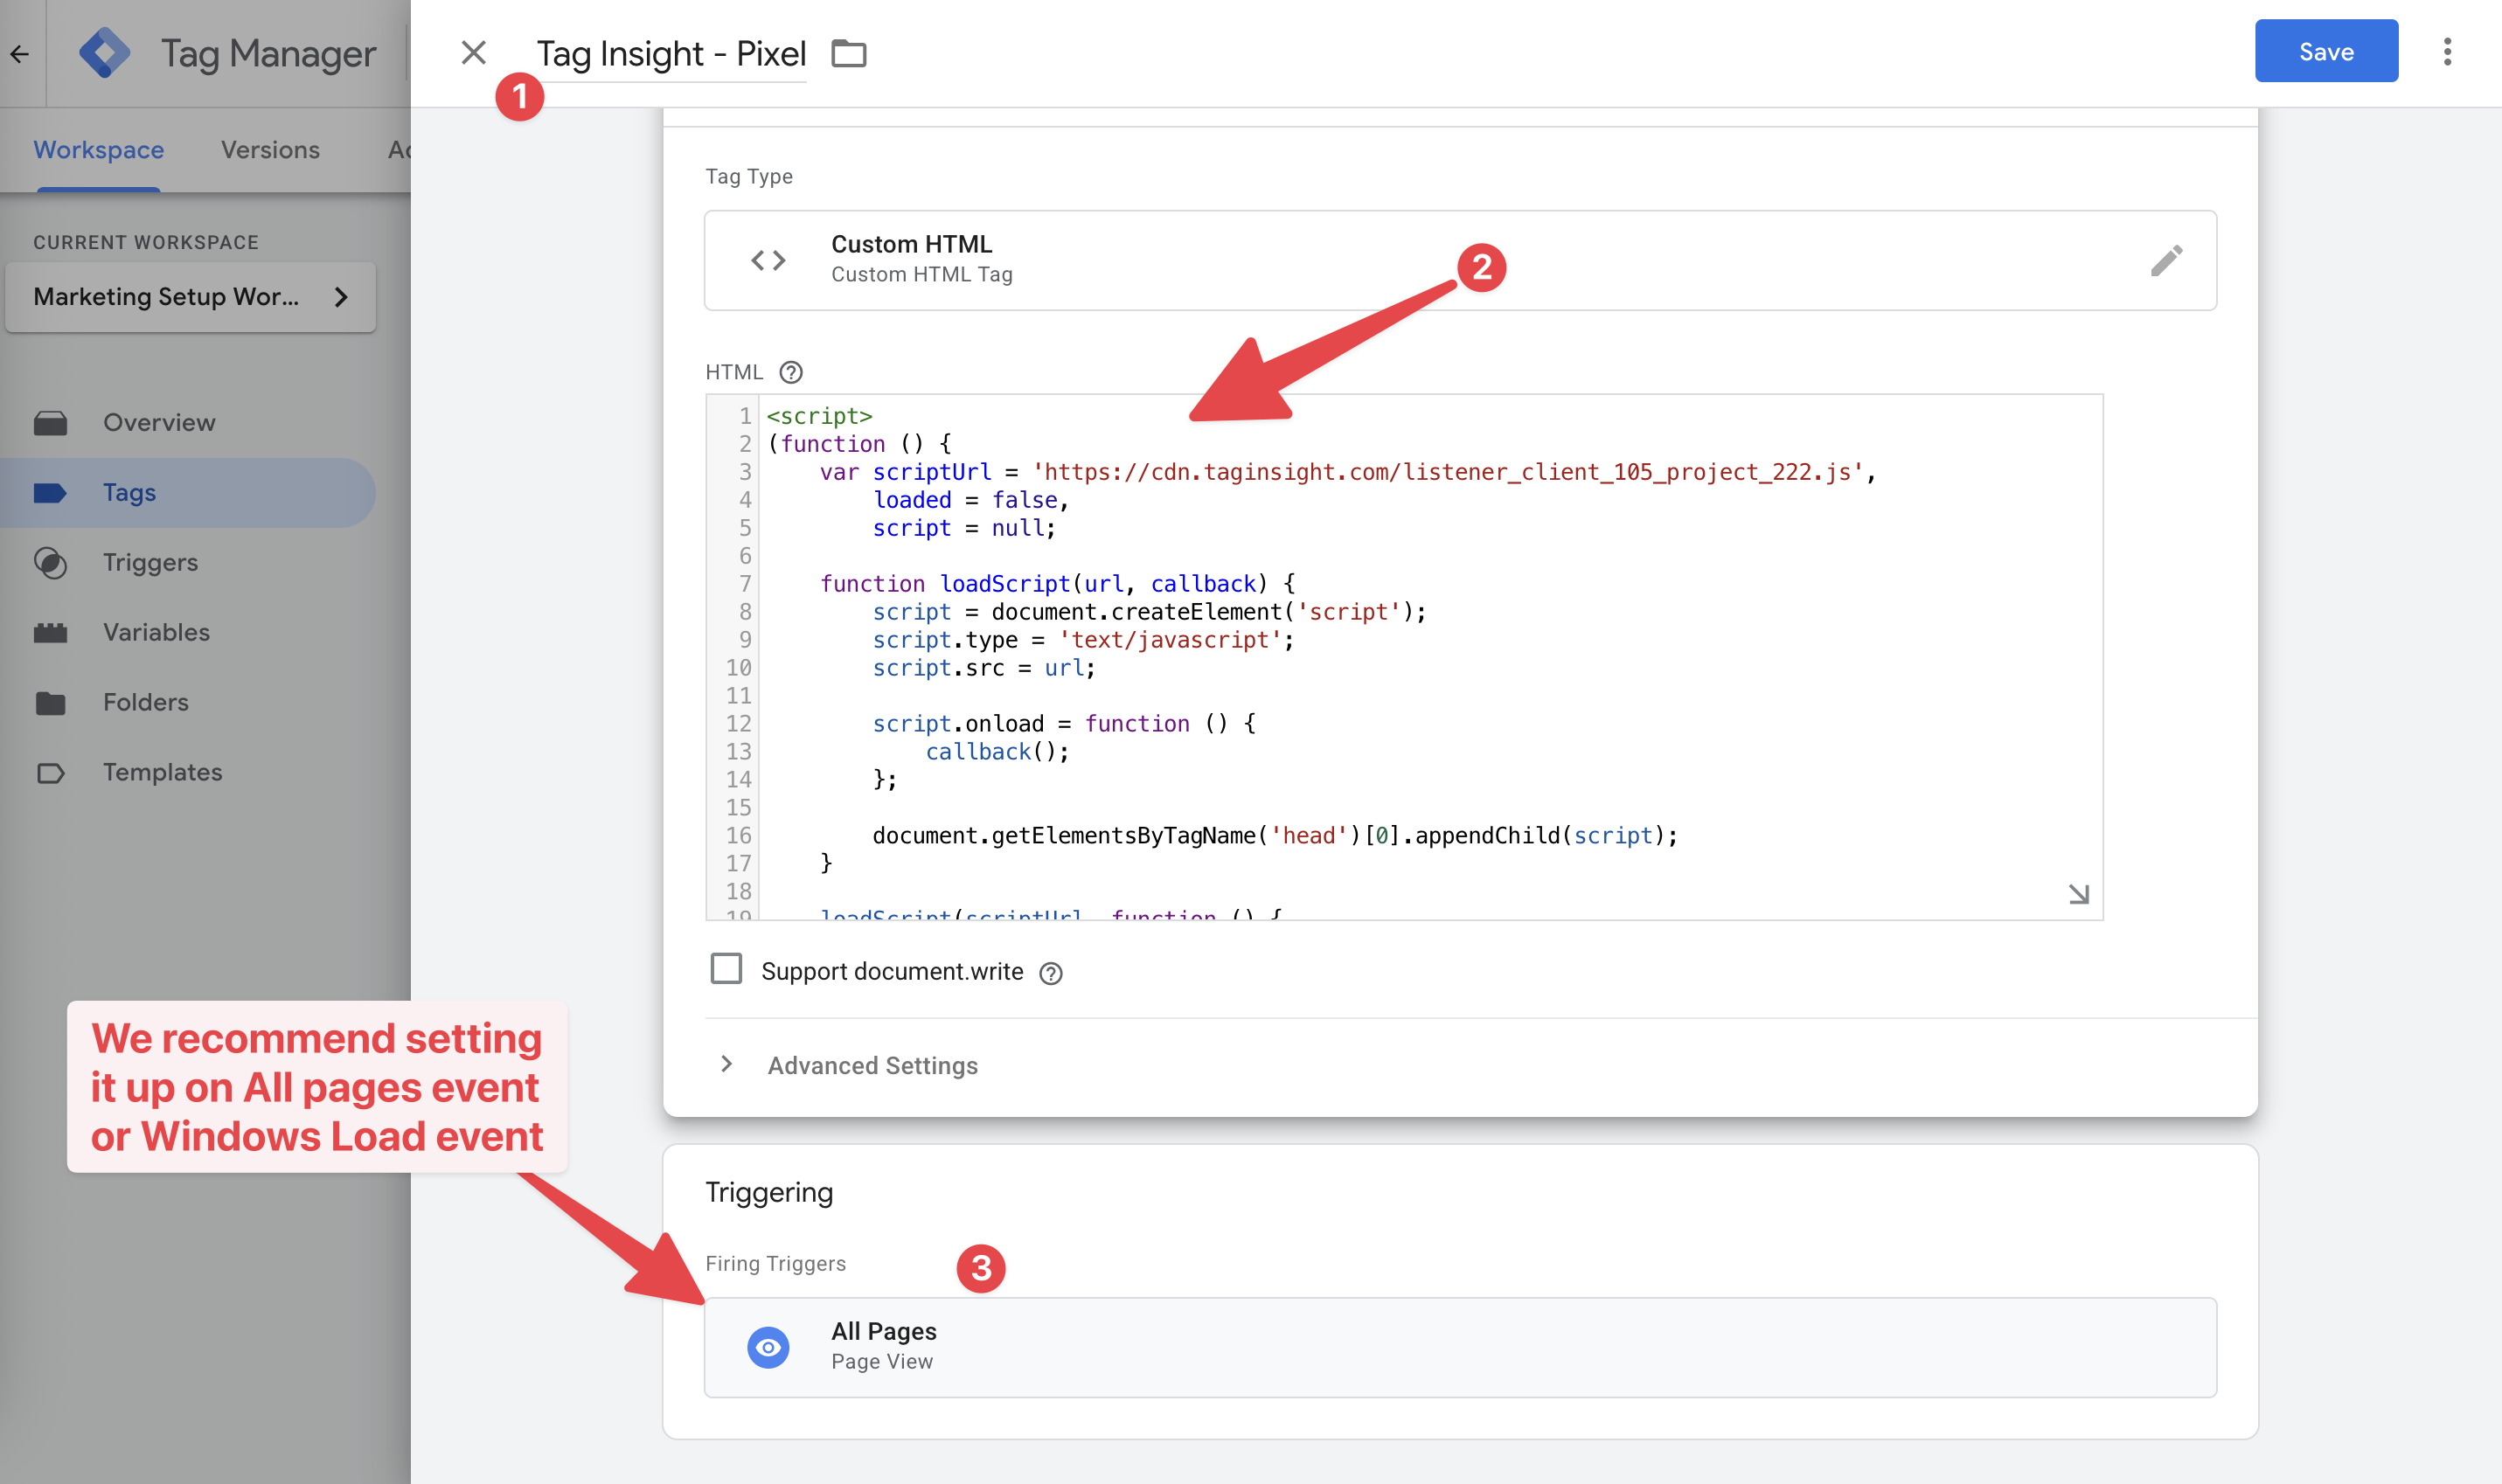 Choose when Tag Insight should run:
**Best for most websites**
* Tracks everything automatically
* No pages missed
* Easiest to maintain
**If you only want to track certain sections**
* Just product pages
* Only checkout process
* Excluding admin areas
**For modern web apps**
* React, Vue, Angular sites
* Dynamic content
* No page reloads
### Step 4: Test before going live
Your developer will test using GTM's Preview mode
They'll click around to ensure tracking works
GTM shows which tags are firing correctly
You can check the Live Debugger to see data flowing
## Different setups
### Multiple environments
If you have staging and production sites:
* Create separate Tag Insight projects for each
* Your developer will configure GTM to use the right project ID
* This keeps test data separate from real data
### E-commerce websites
For online stores:
* Tag Insight automatically works with standard e-commerce tracking
* No special configuration needed
* Compatible with Google Analytics 4 e-commerce
### Multiple websites
Managing several sites? You can:
* Use one GTM container for all sites
* Create separate Tag Insight projects for each
* Or combine them into one project (ask support for guidance)
## Working with your team
### For marketing managers
Share this guide with your developer and ask them to:
1. Install Tag Insight in GTM
2. Test it's working properly
3. Publish the changes
4. Confirm when it's live
### Questions to ask your developer
* "Is Tag Insight installed on all our pages?"
* "Did you test it in Preview mode?"
* "When will it be published to the live site?"
* "Are staging and production using different project IDs?"
### What happens after installation
Once installed, you'll see:
* Data appearing in your Tag Insight dashboard within minutes
* The Live Debugger showing real-time activity
* Audit reports starting to generate
## Common questions
No, your technical team handles GTM. You just need to provide them with your Tag Insight Project ID and this guide.
No, Tag Insight works alongside your existing tags (Google Analytics, Facebook Pixel, etc.) without interference.
Check your Tag Insight Live Debugger - you should see events appearing as people browse your site.
No problem! Tag Insight can be installed directly on your website or through other tag managers like Commander Act.
## Best practices
Always test in staging before going live
Keep notes about your configuration
Verify tracking after website updates
Keep marketing and tech teams aligned
## Troubleshooting
If tracking isn't working:
* Check the tag is published in GTM (not just saved)
* Verify you're using the correct Project ID
* Wait 5 minutes and refresh
* Contact support if issues persist
* The GTM container might not be on all pages
* Check if triggers are excluding certain pages
* Some pages might load differently (like checkout)
* Make sure staging uses a different Project ID
* Check GTM isn't published to the wrong environment
* Use Tag Insight's environment features
## Getting help
Need assistance with GTM setup?
1. **Check our FAQ** - Common setup questions answered
2. **Contact support** - [support@taginsight.com](mailto:support@taginsight.com)
3. **Book a demo** - Get guided setup help
4. **Ask your GTM consultant** - They're familiar with tag installation
## Next steps
See your tracking in real-time
Set up what you want to track
Get notified of tracking issues
Debug tracking visually
Choose when Tag Insight should run:
**Best for most websites**
* Tracks everything automatically
* No pages missed
* Easiest to maintain
**If you only want to track certain sections**
* Just product pages
* Only checkout process
* Excluding admin areas
**For modern web apps**
* React, Vue, Angular sites
* Dynamic content
* No page reloads
### Step 4: Test before going live
Your developer will test using GTM's Preview mode
They'll click around to ensure tracking works
GTM shows which tags are firing correctly
You can check the Live Debugger to see data flowing
## Different setups
### Multiple environments
If you have staging and production sites:
* Create separate Tag Insight projects for each
* Your developer will configure GTM to use the right project ID
* This keeps test data separate from real data
### E-commerce websites
For online stores:
* Tag Insight automatically works with standard e-commerce tracking
* No special configuration needed
* Compatible with Google Analytics 4 e-commerce
### Multiple websites
Managing several sites? You can:
* Use one GTM container for all sites
* Create separate Tag Insight projects for each
* Or combine them into one project (ask support for guidance)
## Working with your team
### For marketing managers
Share this guide with your developer and ask them to:
1. Install Tag Insight in GTM
2. Test it's working properly
3. Publish the changes
4. Confirm when it's live
### Questions to ask your developer
* "Is Tag Insight installed on all our pages?"
* "Did you test it in Preview mode?"
* "When will it be published to the live site?"
* "Are staging and production using different project IDs?"
### What happens after installation
Once installed, you'll see:
* Data appearing in your Tag Insight dashboard within minutes
* The Live Debugger showing real-time activity
* Audit reports starting to generate
## Common questions
No, your technical team handles GTM. You just need to provide them with your Tag Insight Project ID and this guide.
No, Tag Insight works alongside your existing tags (Google Analytics, Facebook Pixel, etc.) without interference.
Check your Tag Insight Live Debugger - you should see events appearing as people browse your site.
No problem! Tag Insight can be installed directly on your website or through other tag managers like Commander Act.
## Best practices
Always test in staging before going live
Keep notes about your configuration
Verify tracking after website updates
Keep marketing and tech teams aligned
## Troubleshooting
If tracking isn't working:
* Check the tag is published in GTM (not just saved)
* Verify you're using the correct Project ID
* Wait 5 minutes and refresh
* Contact support if issues persist
* The GTM container might not be on all pages
* Check if triggers are excluding certain pages
* Some pages might load differently (like checkout)
* Make sure staging uses a different Project ID
* Check GTM isn't published to the wrong environment
* Use Tag Insight's environment features
## Getting help
Need assistance with GTM setup?
1. **Check our FAQ** - Common setup questions answered
2. **Contact support** - [support@taginsight.com](mailto:support@taginsight.com)
3. **Book a demo** - Get guided setup help
4. **Ask your GTM consultant** - They're familiar with tag installation
## Next steps
See your tracking in real-time
Set up what you want to track
Get notified of tracking issues
Debug tracking visually